Sunday, November 1, 2015

20 Minute Potato Wedges (vegan + gluten free)


On Friday, Ryan and I decided we wanted to pick up some Lentil Sloppy Joes from our neighborhood coop, since their deli is amazing. They also had potato wedges to go with the Sloppy Joes, but since potatoes are quite heavy, and the whole meal is priced by the pound, we decided to get their Sloppy Joes and make our own wedges to go with them to save some money. We looked around online for a recipe, but they all took quite awhile to do, since they were all baked potato wedge recipes, and thick potatoes wedges take awhile to be cooked through by baking. Usually at least an hour. Heck, when we make home fries they are thin cut and still take about 45 minutes to bake. 

How could we speed things up so we could make them and get to work on time? (We both work second shift). Microwave them! 

I have used this method before to make quick breakfast potatoes. So, why not just cut them differently and have wedges?! 

This plan definitely speeds things up. The microwave cooks the potatoes through quickly, then you just need to slice them up and pan fry them to get that crisp outside. These can be seasoned any way you'd like. Try tossing them in smoked paprika, cayenne, or chili powder. Or go for a savory flavor with garlic powder and rosemary. We went simple with ours, letting our sloppy Joes take the lead of the meal, and just did salt, black pepper and garlic powder. 

Ryan cooked these ones up. He added the seasonings before he cooked them, so it burnt the garlic and pepper a little... so to avoid doing that, it's better to add the seasonings after the wedges are already cooked.

20 Minute Potato Wedges
 Serves 2

2 medium russet potatoes
2 tbsp cooking oil of choice (we used olive oil)
1 tsp salt
black pepper (optional - to taste)
garlic powder (optional - to taste)

1. Wash the potatoes to remove any dirt. Use a fork and stab the potatoes to make little holes for steam to vent out, around 6 stabs per potato.

2. Put the potatoes on a plate in the microwave. Microwave time will vary depending on the power of your microwave and the thickness of your potatoes.
 *We have a 1000W microwave and cooked the potatoes for 5 minutes. You can check if they are done by poking it with a fork. If it slides into the potatoes smoothly, they are done. If it doesn't go in smoothly, try microwaving them for another minute or two.

3. Take the potatoes and cut them (carefully, they are hot!) in half, and then into quarters to create 8 wedges per potato.
* I find that using a serrated knife helps to get through the skin of the potato better without just pulling it off. Feel free to use a clean dishcloth to hold the hot potato in place while cutting it.
* After you cut the potatoes in half, it is easier to cut at an angle to get the wedge shape while you cut the potatoes into quarters, so the potato is lying flat on the cutting board, rather than trying to cut the potatoes into quarters and then stand each quarter on its edge to halve those. 
                                             
                                                   YES                                           NO
4. Heat the oil in a pan on medium high heat. Add the potatoes and cook for about 3 minutes, or until crisp. Then, turn the potatoes onto another side and cook another 3 minutes. Repeat for the third and last side. 

5. Turn off the heat and put potatoes in a bowl. Add salt and whatever other seasonings you'd like and toss to coat. Serve immediately.

Monday, October 19, 2015

Maple Almond Butter (vegan + gluten free)


One of the things I have become addicted to recently is Justin's Maple Almond Butter. I love dipping apples or pretzel sticks into it as my after work snack. However, it is really expensive (about $10 for a 12 oz jar) and I can't afford my habit of eating a jar every week and a half.  So I decided to try to make my own almond butter. 

I hunted around online in search of instructions, and they all made it seem really easy. Toast nuts, put in food processor, process for ages and ages (usually around 10-25 minutes, depending on the processor you use) and woo-hoo, you have almond butter! So, I figured I'd try it. 

I had two failures before I got it right. Yep... two. That's a lot of wasted almonds. Now I have it figured out though, and I'll let you know what I did so you don't make the same mistakes.

On my first batch, I toasted the almonds, dumped them into the processor and blended it up. It had been on high for about 20 minutes and showed no sign of turning into butter so I thought maybe if I pour some of the maple syrup in now, it'll add moisture and help it process better. Nope. Bad, bad, bad idea. It seized up the whole batch, turning it into a playdoh type mass. It finally released it's oils, but in this nasty way of secreting them and expelling them from the mass of almond dough. 

So, rule number one: DO NOT ADD ANYTHING TO THE ALMONDS BEFORE THEY ARE A SMOOTH BUTTER. Save the salt and/or cinnamon or any other dry flavors until the end.

My second batch I was more patient. I also tried using my blendtec blended instead of the food processor to try and get a creamier consistency. It worked! My toasted almonds became a beautiful smooth butter! Then I thought, I can just add the maple syrup now. It's butter, what could go wrong?

It seized up again, but not into a dough. It lost its creaminess and turned into a texture like damp sand. It was like the oils all disappeared. This batch I was able to save as a yogurt topper, or I may try using some on an apple crisp or something. It definitely will not work as butter though.
Second rule: DO NOT ADD ANY LIQUID TO THE ALMOND BUTTER.

The way to get that maple taste is to toss the almonds in maple syrup before you toast them. The syrup dries onto the nuts, bringing its taste in the form of dry sugar crystals rather than a liquid. I'd imagine it would work the same if you wanted to use vanilla, honey, liquid smoke or any other liquid to make other flavored almonds. 

Hopefully my failures can help you, and you can avoid the same fate!


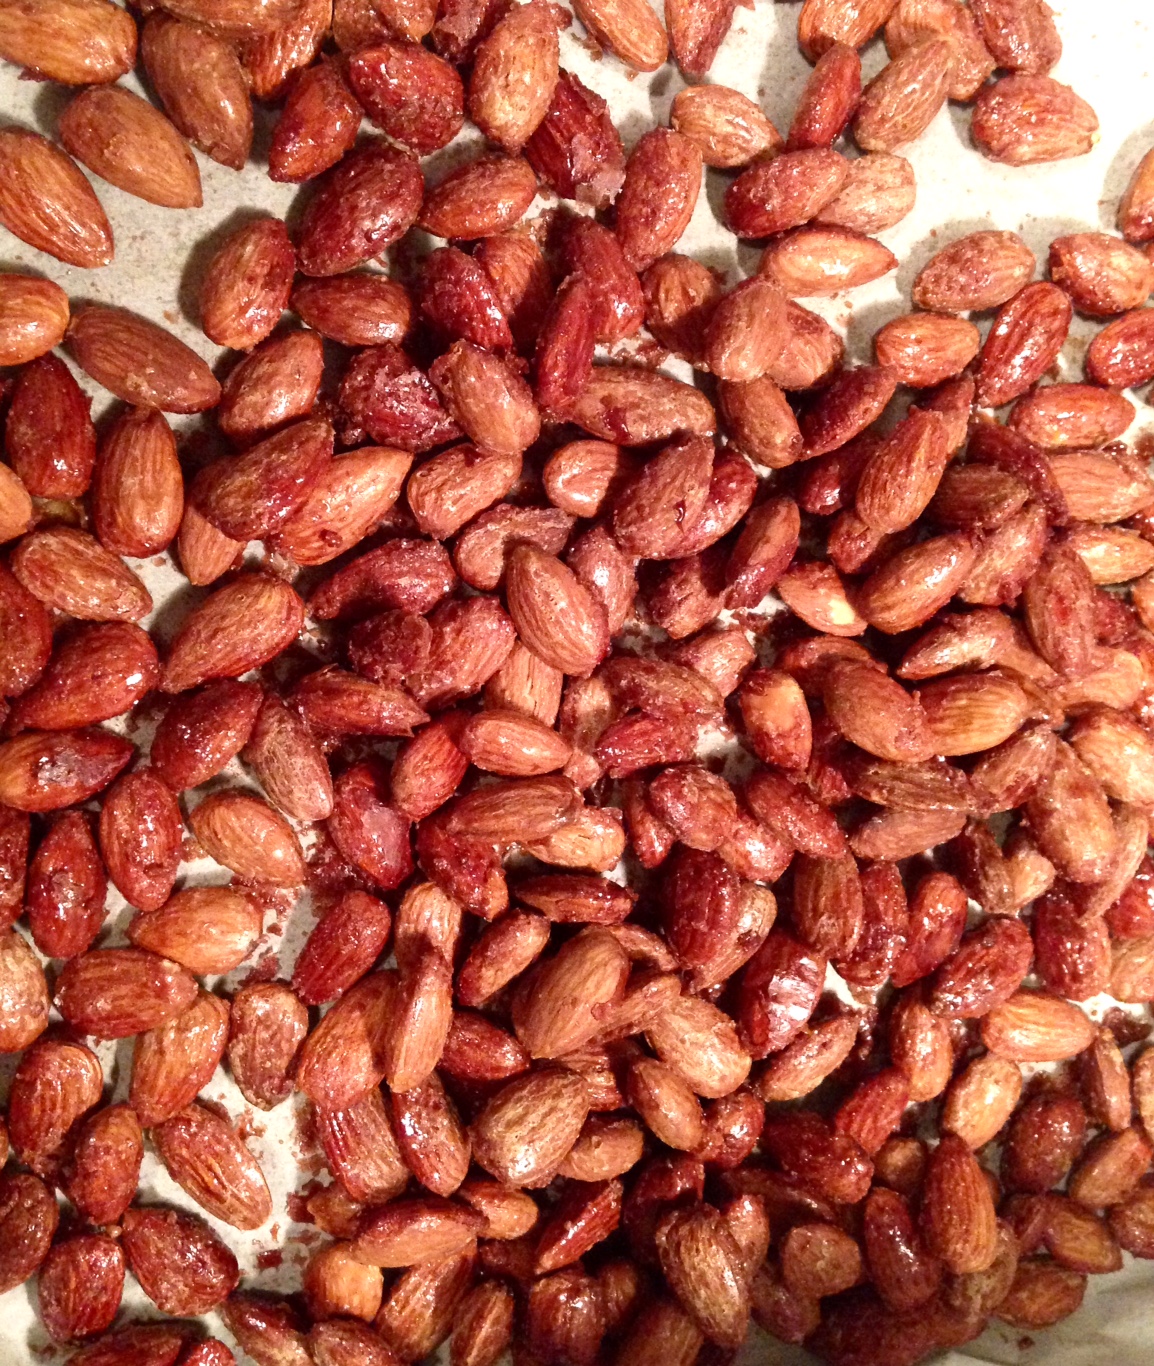
Here are the almonds of my third batch, after being toasted with the maple syrup.


  Here is a comparison of texture. The top left jar is the third batch, smooth almond butter, and the bowl is of the second batch, with the sand-like crumbles.
 I saved the crumbles batch anyway to use in my coconut yogurt with strawberries.


 Maple Almond Butter:
2 cups raw almonds
3-4 tbsp pure maple syrup
1 tsp salt

1. Preheat your oven to 350 degrees F.

2. Toss the almonds with the maple syrup to coat them. Lay them out in a single layer on a cookie sheet lined with parchment paper (it keeps them from sticking to the cookie sheet and makes for super easy clean up!).

3. Bake the almonds for 10-15 minutes, until the maple syrup looks more sticky.

4. Take almonds out of the oven and allow to cool about 10 minutes. We still want them a little warm for the food processor, it makes them easier to process.

5. Break apart any chunks that have formed, and put the almonds in a food processor or high powered blender. Feel free to just eat a couple almonds, they're already delicious at this point ;)

6. Blend on high for 10-25 minutes (depending on the power of your blender/processor) It's noisy at first, but quiets down pretty quickly. It will first become crumbs, then a texture like dry sand, then like damp sand, and finally the oils will release and it will look like store bought almond butter.

7. Add in salt and mix until incorporated. Pour into a jar for storage. I like to use wide mouth half pint jars, for easy apple or pretzel dipping.

Sunday, October 4, 2015

Vegan Brussels (Belgian) Waffles


Last February I discovered a wonderful podcast called Stuff You Should Know. They cover an extremely wide range of topics, and a month or so ago I listened to their podcast about Belgian Waffles. They explained that what we, in the USA, think of as "Belgian Waffles" don't actually exist in Belgium. There, they have two main types of waffles they make, and neither is referred to as a "Belgian Waffle." There is a Liege waffle, which is made with a thick and sticky batter, almost like dough, which contains chunks of sugar, that caramelize to make a crunchy coating with a doughier center. The other common waffle in Belgium is a Brussels waffle. It is a yeast batter, making the inside super light and fluffy and the outside has a nice crisp to it. (Think normal grocery store doughnuts vs. Krispy Kreme. The yeast is what makes the latter so much lighter and fluffier) I think of it kind of like a funnel cake in waffle form. They are traditionally street food, eaten with the hands with just some powdered sugar on top.

When I heard this podcast, I decided I needed to get a waffle iron (with deep pockets, made for Brussels waffles) and make some Brussels waffles. Light and fluffy? Yes, please!

Last weekend I found a perfect waffle iron at Macy's on clearance and I snatched it up and started hunting down a recipe. I was dismayed to find that there doesn't seem to be a single vegan Brussels waffle recipe anywhere on the internet. So, I read through a bunch of authentic Brussels recipes and tried veganizing one myself. I was afraid they'd turn out horrible, but I had to give it a shot. I was super pleased to find that they turned out very well! These will be a new staple in our weekend diet.
 

We had some leftover raspberry compote from the pears I made earlier this week, which made a great topping for the waffles. Though they were delicious even with just the powdered sugar.


Look how fluffy that inside is! Mmm...


Vegan Brussels (Belgian) Waffles
Makes about 20 waffles

9 tsp Ener-G egg replacer, divided
9 tbsp water, divided
2 tbsp sugar
1 1/2 c plant based milk, warmed (not hot)
1 packet dry active yeast (or 2 1/4 tsp if you have a jar of it)
1 1/2 c room temperature carbonated water
3 1/2 c white all purpose flour (don't substitute whole wheat, it will keep them from being fluffy!)
4 1/2 tsp baking powder
5 oz dairy free butter, melted
a pinch of salt

1. Mix 4 1/2 tsp egg replacer with 3 tbsp water in a small bowl. Mix the other 4 1/2 tsp egg replacer with 6 tbsp water in another bowl and whip with a mixer to make a foam like egg white with very soft peaks. Set theses two bowls aside.

2. Combine warm milk, yeast and sugar. Allow to bloom for about 10 minutes.

3. Lightly beat the first (less water) bowl of egg replacer into the yeast mixture. Add the water and gently stir to combine. Add flour and baking powder and mix with a mixer until there are no clumps.

4. Melt the butter in a sauce pan or microwave, then beat into mixture. Gently fold in the second egg replacer bowl contents, and add a pinch of salt.

5. Allow the batter to rise for 30 minutes, turning the waffle iron on about 5 minutes before it is done so it is nice an hot by the time the dough is ready.

6. Melt a little butter in a bowl and use a pastry brush to lightly coat the waffle iron so it doesn't stick.

7. Pour batter into each waffle square and spread out with a spatula before closing. Depending on the size of your iron, you'll have to experiment a bit with how much batter to put into each waffle spot and how long to cook them. Mine had about 1/2 c in each spot, and cooked for 7 minutes. The outsides will brown quicker than the insides will cook, so don't take them off too soon. If you poke at a waffle with a fork it should feel firm inside, not soft.

If you make the waffles quicker than you and your family can eat them, put them on a cooling rack rather than piling up on a plate as they cool. That will keep the outsides nice and crisp. I couldn't find my cooling rack, so I just used the rack from my convection oven to cool them on.

Update: I tossed some left over waffles into a baggie in the freezer, and they reheat wonderfully! Just put them in a toaster and they will reheat and crisp up the outside again while keeping their fluffy center. Now, every time I make these waffles I make at least a double batch, sometimes triple, and just keep the rest in the freezer! So much better than store bought frozen waffles!

Hello Fresh review


I kept seeing ads all over Facebook for a website called Hello Fresh. Every week they come up with three meat based meals and three vegetarian meals, and they ship you the recipe and all the ingredients for the three meals. You can order a box for two servings per meal or four servings per meal. I always thought this would be a cool idea, ever since I heard of Blue Apron, but they didn't deliver to our area so I could never try it. So, when I saw a coupon code for Hello Fresh on facebook for $35 off, I figured I'd give it a try. They don't have any option to customize your food, like to make it vegan, however since they just send you all the ingredients we were able to just make the meals without adding the dairy products.

The box the food came in was very well packed. It had an insulating liner around all the food, and two big ice packs to keep everything cold. All the food was divided by meal, into three boxes. It also came with a nice booklet with the instructions for each recipe.

This week's menu for vegetarians was:
1. Potato Latke's, with Beet Salad
2. Israeli Black Eyed Peas, with Fenugreek and Eggplant
3. Quinoa Veggie Loaf with Baked Radishes and Broccoli

The photos I have are of the Quinoa Veggie Loaf, which was our favorite of the three.

Here is the box the meal came in:
 All the ingredients from the box:
 The competed meal:

The loaf wasn't very solid, like the sliced pieces in their photos, but it tasted very good. That may have partially been because we didn't use the pack of Parmesan cheese which may have been a binder for it. We also used our own ketchup (Full Circle organic) for the sauce, since they sent a mini bottle of Heinz ketchup which has high fructose corn syrup in it. Other than that, though, the rest of the food was very fresh and healthy. I'll definitely be repeating this recipe with my own ingredients.

The Potato Latke's meal was plain, but tasty. I used vegan butter instead of the sour cream that came with it. The beet salad side dish with it was a bit too beety for us, but my mom tried it and loved it so she took it home with her.

The Eggplant meal was great, the only part of that meal I wasn't crazy about was the tomatoes in it. I'm not a big fan of tomatoes and there was quite a bit in there. I may try remaking it sometime with some organic fire roasted tomatoes and halving the quantity. Then I think I'll really like it.

Overall, I really liked the food and loved the convenience of Hello Fresh. Although, I don't think I'll continue getting it on a regular basis for two main reasons. Firstly, I can't really afford to pay essentially $10 per person per meal, which is what the standard cost of the meals is when you don't have a coupon. If I'm going to pay $10 for one meal, I'd rather it be a night out where I don't have to cook it. Also, many of their vegetarian meals would not be able to veganize. For example, they do versions of grilled cheese quite often, which would make my plan of just leaving out the dairy impossible.

Really, I think it's a better idea to just use their recipes and buy the ingredients myself. WAY cheaper, and then I can get organic produce and vegan cheeses (if necessary) all while supporting my local suppliers.

Also, if someone really wanted to have the ingredients delivered to them as well, they could just order the ingredients from the ingredient list on the recipes online from a grocery store that delivers and then even with the delivery charge it'd still end up costing far less money. Plus then you can get whatever else you want to snack on as well besides the main meals included in that delivery.
So, unless they dramatically drop the price, I won't be ordering from them again. However, I do like their recipes and will be using those with ingredients I buy myself from time to time.


Thursday, October 1, 2015

Vanilla Poached Pears with Raspberry Compote (Vegan)

I'm loving fall. Last year I was in Spain from September until the end of January, so I completely missed my favorite season, and with it some of my favorite fall foods. Right now is peak raspberry season, and I found some gorgeous little organic pears at our local coop that are in season now too. I bought the pears on a whim, figuring I would come up with something I could do with them. Then my one of my relatives with a big garden gave my mom a big bowl of raspberries, and she split them with me. Thanks mama ;)

So what could I do with these two things? How about poached pears and a raspberry sauce? I pitched the idea to Ryan and he was all for it, so I improvised this recipe. It turned out very tasty.... I especially love the compote.


 Don't those raspberries look amazing? So juice and delicious! The compote turned out so tasty, I may make extra next time to use as jam on pancakes or mix into ice cream.


 The pears were pretty small, so I got 12 of them. They make for a nice little snack, but took awhile to core and peel.


Here are the pears after being poached, and the compote with the raspberries added reducing in the pot.


Vanilla Poached Pears with Raspberry Compote

12 small pears or 6 large pears, cored (from the bottom) and peeled, leaving stems intact
2 cups water
1 cup white wine (I used chardonnay)
1 vanilla bean, halved lengthwise and insides scraped out and added to pot
3/4 cup sugar
2 cups raspberries, mashed

1. Put the wine, water, vanilla bean and sugar in a pot and turn heat to high. Stir while it heats to dissolve the sugar.

2. Once it starts to boil, reduce the heat to a simmer and add the pears. The stems make a great little handle to lower them in. The liquid should come at least half way up the pears if you're using the right sized pot. Cover and simmer for 25 minutes.

3. Move the pears from the pot onto a plate. Remove the vanilla bean pieces and add the raspberries to the left over liquid. Turn heat to high and reduce the liquid, stirring occasionally, for 20 minutes. It will thicken more as it cools, so don't worry if it is sill a little thin.

4. Either serve immediately, or refrigerate pears and compote separately. Combine and reheat when ready to serve.


Roasted Red Pepper Pasta (vegan + gluten free options)


So, I have a tendency to see pretty fruits and veggies at the grocery store and get all excited to use them, so I buy them, and bring them home with no particular plan for them in mind. This was the case a couple weeks ago with some beautiful red peppers. Of course, they made their way into my fridge and I completely forgot that I had them and they got really soft. However, since I really hate wasting food I did not want to throw them away.
What could I possibly make with really soft red bell peppers? Pasta sauce of course! If they're going to be pureed anyway, it doesn't matter if they've lost their crunch.

As usual, I started by making a fresh batch of almond milk to use for the recipe, leaving it thicker than usual. Then, once I finished using what I needed for the pasta sauce, I added more water to the rest of the milk to make it more like I usually drink.

I also had about 8 ounces of baby portabella mushrooms in the fridge as well, so I figured they'd make a great addition to the pasta. Though, by the time I was done with it I wish I had added way more mushrooms! I made a batch of this big enough to feed both me and my boyfriend, Ryan, for the whole work week as our dinner, along with some herbed carrots and what was left over of his birthday brownies I made last Sunday. So, in the recipe I'll list the amount of mushrooms I wish I had used, rather than how much I actually used.
 It's a good idea to speed things up a bit by baking the peppers first, then letting the pasta cook while you saute the garlic and onions and let the peppers steam. This picture is of a double batch, so don't worry if yours looks like less!

Vegan Roasted Red Pepper Pasta
Makes about 14 cups. I had 2 cups per serving, Ryan had 3 cups.

12-14 oz pasta of choice, whatever the box size is (feel free to get gluten free pasta)
2 red bell pepper, whole
2-3 tbsp olive oil, or water to water saute
1/2 of a large yellow onion, roughly chopped
5 cloves garlic, whole
salt and pepper, to taste (I like a lot of salt in this one)
1 1/2 cups unsweetened almond milk (or other plant based milk)
1/4 cup nutritional yeast
2 tbsp cornstarch (if you are gluten intolerant, make sure it is pure, non-GMO to insure no gluten traces)
1/4 tsp red pepper flakes (more if you want the heat noticeable)
1/2 tsp smoked paprika

Optional:
2-3 tbsp of any of your favorite fresh herbs. I used sage, parsley, and thyme.
vegan parmesan cheese, to serve
1 lb baby portabella mushrooms, cleaned and sliced (recipe below)

1. Broil the whole peppers directly on the rack until blackened/blistered on all sides, rotating to evenly cook, about 20 minutes. They will look collapsed, and become soft. Wrap the hot peppers in tin foil, or but in a container with a lid to steam themselves (I just used a pot with a lid).

2. Start cooking the pasta.

3. Roughly chop the onion. Heat a pan and add oil if you are using it. Put the onions and garlic in and saute until golden with some brown spots. If you are water sauteing, just pour in a few tablespoons of water once in awhile when the onions start to stick, and stir to loosen from the pan. It is essentially a mini deglazing process. Remove from heat.

4. By now the pasta should be done, so drain it. Don't rinse it, and don't add oil to it, it keeps the sauce from sticking!

5. Take the peppers out of their steaming vessel and pull or cut the stem and seeds out. Peel the charred skin off. Put the prepared peppers in a blender along with the onions and garlic. Add the rest of the ingredients (except the pasta, of course!) and blend until smooth.

6. Pour sauce onto pasta and stir, add any of the optional add-ons, and enjoy!


Sauteed mushrooms
Clean and slice the baby portabella mushrooms. Heat a pan to medium high and add 1-2 tbsp of olive oil. Add the mushrooms, leaving space between them so they saute and don't steam themselves. Flip after a minute or two, once they have browned on the bottom side. Cook another minute and remove from pan. Add salt and pepper to taste. Use to top pasta or stir them right into it. 

Wednesday, September 30, 2015

Introduction and Almond milk (vegan + gluten free)

Hi! My name is Anna, and I LOVE to cook and bake! I experiment on a weekly basis and most of the time my creations turn out wonderfully! Though sometimes not so much... super salty cookies? Fail. Hey, they can't all be masterpieces.

Before I get into everything, I just want to say that you don't have to be vegan to eat my food! It is super tasty, and all my non-vegan friends love it. If you find recipes you like, great! Have a meatless, eggless and dairy free meal. Every little bit helps the animals and the environment. Hopefully you'll find enough recipes that you like to have several meatless meals a week, or even in one day! Maybe one day you'll take a step and try to be vegan for a month or longer. However, if you are someone who could "never give up steak" or "can't live without cheese," I won't make you. Just try not to eat it every single day.

Let me tell you a bit about myself, and how I came to be here today:

I became vegetarian about two years ago, and vegan around a year ago. I wanted to become vegan initially because I watched the documentary Forks Over Knives and discovered how horrible eating animal flesh and secretions is for your body. Once I switched to the vegan diet, I found it difficult at first. So, I tried to educate myself on the ethical reasons to be vegan. I figured, if I have some gruesome factory farm images in my head while I look at a burger I won't want to eat it as much and it won't be a matter of will keeping me from wolfing it down.

Then I discovered The Joyful Vegan podcast with Colleen Patrick-Goudreau. Just her vocabulary and manner of speaking about animals made my whole mind rewire itself. I wasn't denying myself beef and chicken, I was saving cows and chickens from a horrible fate. If you say "I don't eat chicken" people imagine a cooked chicken breast on a plate. If you say "I don't eat chickens" they imagine a group of live chickens pecking around. It's amazing the impact words can have.

Recently, I watched the documentary Cowspiracy as well. It was also a huge eye opener that makes me want to eat animals and their secretions even less. The impact animal agriculture has on our planet is astonishing! I highly recommend this documentary. It showed me that my choice to not eat animal products is also helping to save our planet. The amount of resources (water, grain, land) used to factory farm animals is astonishing. Let me throw some stats at you:

Growing food for livestock uses 56% of the water supply in the US. 1000 gallons of water are needed to make 1 gallon of milk. 2500 gallons of water are needed to make 1 pound of beef. Animal agriculture is responsible for 91% of the Amazon rainforest distruction. 1.5 acres of land can produce 37,000 lbs of plant based food. That same amount of land can only make 375 lbs of meat. For those who think fish is the solution: scientists estimate that as many as 650,000 whales, dolphins and seals are killed each year by fishing vessels. 40-50 million sharks have been killed in fishing lines and nets. All of this info is cited, and the sources are available on cowspiracy.com/facts

Ok, spiel done. I just wanted to tell you the reasons I personally decided to live this live of compassion, and let you know where I got my information if you would like to learn more about it as well. I'll tell you, it does make it a lot easier to know all of this which makes me not want animal products, rather than just forcing myself to not eat them without any ethical reasons behind it.

Now to the fun stuff! As part of becoming vegan, I had to learn how to adjust recipes and get creative so that I could continue my passion for cooking and baking. I learned about a lot of new (well, new to me) foods and found some new favorites. Nutritional yeast anyone? Mmm. 

I bought some vegan cookbooks and followed recipes very carefully to begin with, but once I got the gist of how these new foods and products work I was able to get more creative and make my own recipes. This blog is mainly just so I can share my recipes with everyone, and prove that a vegan diet is Not Just Rabbit Food. I have shared most of these foods with my friends and family who are NOT vegan, and they all loved them and said that if they could eat like this every day they could be vegan. I promise, to everyone who says "I could never give up meat" as well as people like my sister who say "I could never give up cheese!" I will show you that it really isn't as hard as you think, and once you get into some tasty vegan goodness you'll never miss (and never want!) dairy cheese or meat again. All the animal, the environment, and your health will thank you!


Now for one of the recipes I use the most, since it is an ingredient in a lot of my other recipes:

Almond Milk


All you need for this recipe is almonds and water, a blender, a nut bag or cheese cloth, and a container to put the finished milk in.

A word on blenders: I highly recommend having a really good quality blender. It is an investment that you will thank yourself for all the time. My blendtec blender is used on a daily basis. I got mine used on ebay for a very good price (around $350 for an industrial blender from a smoothie shop that usually goes for around $1200). Vitamix is another really great brand of blender. Neither of them is the prettiest blender to have on your counter, but they're really worth the price!  


When I make nut milk, I like using a large wide mouth jar. I use the ring to hold the nut bag in place when I pour, then squeeze the milk into the jar so it can't spray around everywhere. It's also convenient to shake the jar to remix the water and almondy goodness, since it will separate a bit in the fridge.


Ok, to the recipe:

Almond Milk

Ingredients:
1 cup raw UNSALTED almonds
3 cups water, plus more to thin it to the consistency you want

Optional add ins:
2 tsp vanilla
3-4 medjool dates (grind and strain with almonds) for a caramel flavor and extra sweetness
powder or liquid stevia, to taste
cinnamon
cocoa powder 

1. If you don't have a high powered blender, soak the almonds in some water for a half hour to soften them. If you do have a high powered blender you can just toss them right in the blender with the water.

2. Blend the almonds and water. It will turn white and look rather grainy. I let mine sit for a couple minutes so the ground up almond bits can mingle with the water to make it super creamy. 

3. Pour the mixture through a nut bag or cheese cloth into a bowl or large jar. I like to use this bag and strain into a large wide mouth jar, since when you squeeze the milk through the bag it likes to spray in every direction. 

4. Thin the milk to whatever consistency you like. It will be somewhere between the consistency of cream and whole milk when you strain it, so if you prefer 2%, 1% or skim milk you can just add more water and stir it in. I like the jar method, so it is easy to just shake it in. 

5. Add any flavors you want. I usually just leave mine unsweetened and with no vanilla, since I use it for recipes that would taste odd with sweet milk (like my red pepper pasta sauce). 

Oh! Don't throw that almond meal left in the bag away! You can spread it on a cookie sheet and bake it for a couple hours at around 300 degrees and once it is dry blend it again to get almond meal to bake with. I use mine primarily for my almond croissants. What I like to do is toss that wet almond meal from the nut bag right into a plastic bag and freeze it. Then each time I make almond milk I add to the freezer bag until I have enough meal to completely cover my baking sheet. That way I don't have to bake it each time I make almond milk.


This milk will keep for around 4-5 days in the fridge. I usually end up making a bit more than a liter, but the amount you make depends on how much you thin it out. I like mine a little thicker than 2% milk.